Keeping your Windows 11 operating system up to date is important for optimal security and performance, but most users overlook this. That's why Windows 11 automatically downloads and installs Quality and Secure Windows Updates in the background.
Windows Updates often fix bugs and improve performance for the Windows 11 operating system.
Although Microsoft performs proper testing before rolling out updates through the Windows Update service, it is rare for an update to break your Windows 11 operating system.
If you feel that your Windows 11 installation is not working properly after installing the update, you can try uninstalling to check if that solves the problem.

1. Open the Windows 11 Settings app. In the left pane, click Windows Update.
2. On the right side, in the More options section, click the Update history link to open the Windows Update history page.

3. As you can see, the page displays a list of recently installed feature updates, quality updates, driver updates, definition updates, and other updates.
In the Related settings section, click on Uninstall updates. This will open the classic Installed updates window.

4. Next, right-click on the update you want to uninstall and click the Uninstall option. Note that Windows 11 does not let you uninstall all types of updates. So, you will see updates only that can be uninstalled.
5. An Uninstall an Update prompt will appear. Click Yes in this prompt to continue.
6. If you are asked to restart your PC, please do so to complete uninstalling the update.
Video:
Uninstall Windows Updates via Control Panel in Windows 11
1. Type appwiz.cpl in the search or Run command prompt and press the Enter key to open the Programs and Features window of the Control Panel.
2. In the left pane of the Programs and Features window, click on the View installed updates link.

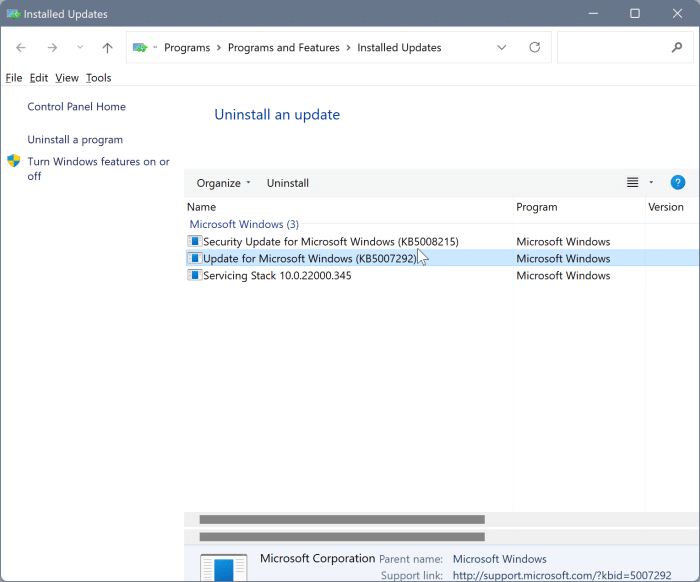
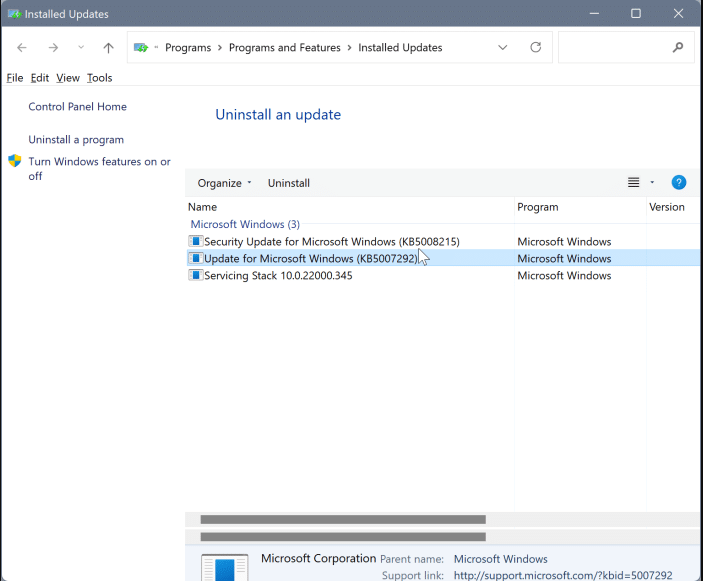
3. As you can see in the picture below, the Installed updates window shows all recently installed Windows Updates.
4. To uninstall an update, perform a right-click on the update and then click the Uninstall option.
5. When you get the following confirmation dialog, click on the Yes button to go ahead and uninstall the update.
Note: that some Windows Updates might ask for a system reboot to complete the uninstallation. If you get a prompt, save your work and click the Restart Now button.
Uninstall Windows 11 Updates via the Command Prompt
1. To get started, navigate to the Start menu search bar, type in command prompt, and run the Command Prompt as an administrator. To do that, right-click on the Command Prompt icon and select Run as administrator.
2. This will launch an elevated Command Prompt on your screen. Type the following command into your terminal. Hit Enter and Command Prompt will list all the updates on your PC.
wmic qfe list brief /format:table

Note the HotFixId of the update you’d like to uninstall, use that in the following command:
wusa /uninstall /kb:HotFixID
If you want to uninstall, say, an update with HotFixID of KB5006363, then you’ve to put the ID number in place of HotFixID template. As such, here’s what your command will look like:
wusa /uninstall /kb:5006363
When you hit Enter, a ‘Windows Update Standalone Installer’ dialog box will pop up; click Yes to begin the uninstallation.

Your update will be successfully uninstalled in a few seconds.
Uninstall Windows Updates when PC is not booting
Did you know that you can uninstall Windows Updates even if your PC fails to boot?
This method is ideal when your Windows 11 PC fails to boot after installing a Windows Update. Note that this method only allows you to uninstall the latest quality or feature update.
1. Turn on your PC and access the Advanced options screen.
2. On the Advanced options screen, click on Uninstall Updates entry.

3. Next, depending on your requirement, click either Uninstall latest quality update or Uninstall latest feature update.
Your PC will restart once.

4. If you selected the Uninstall latest quality update in the last step, you get the following screen where you can click on the Uninstall quality update to begin uninstalling the most recent quality update.
And if you selected Uninstall latest feature update, you get a similar screen with Uninstall feature update button.

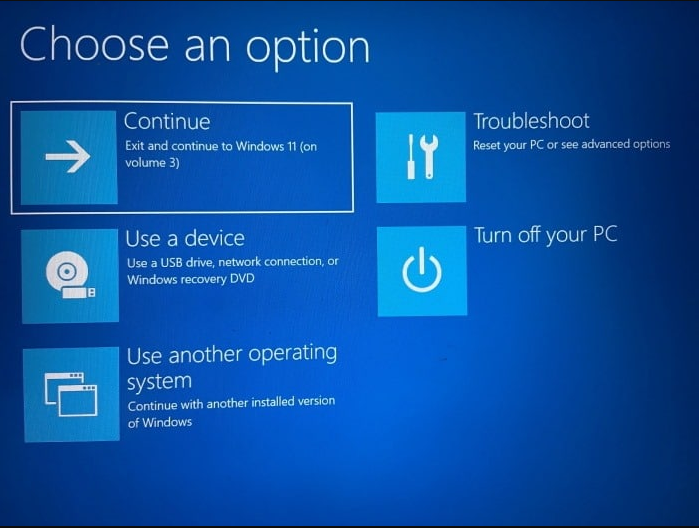
5. Once an update is uninstalled, click the Done button to see the Choose an option screen.
6. Here, click on the Continue option to boot into Windows 11 operating system. If you prefer to turn it off, select the Turn off your PC option.


No comments:
Post a Comment