Sometimes, for privacy reasons, you may want to hide certain folders or folders so that they don't appear in the search results that come back every time someone makes a query with Windows 11 Search. . Regardless of the specific reason, configuring your PC to exclude certain folders in system search queries shouldn't be complicated. Find out below.

1. Open the Windows Settings by pressing Windows Keys+ I from the keyboard.
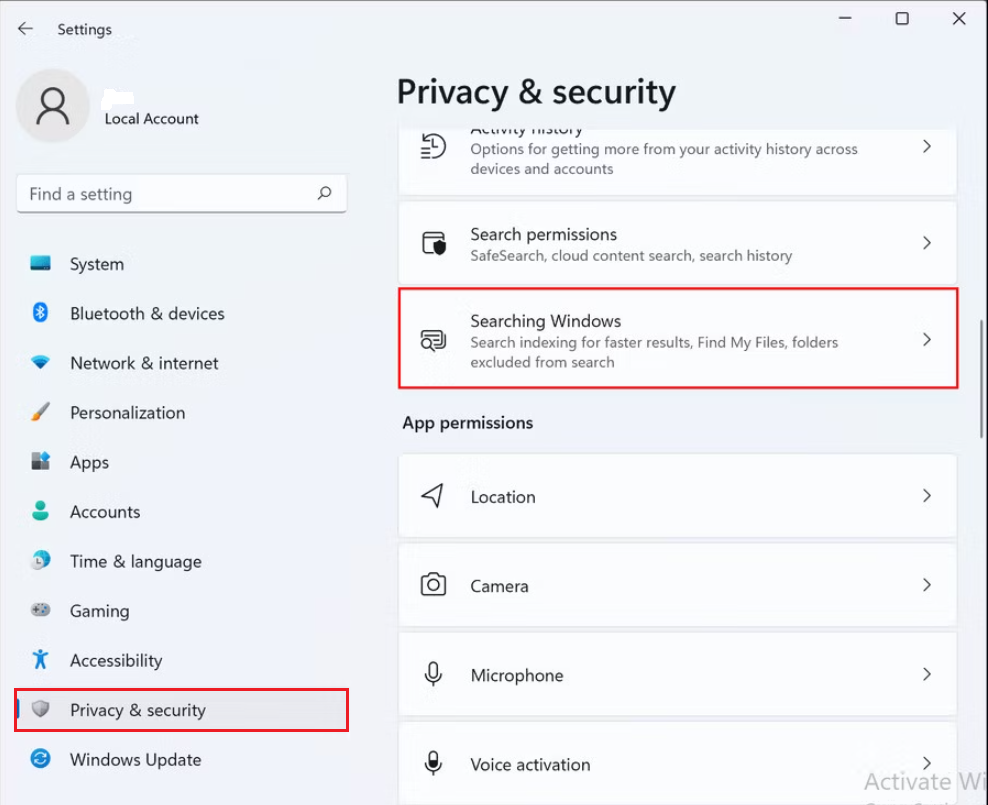
2. In Settings, press Privacy & security > Searching Windows.
3. Under the Find my files section of the Searching Windows page, there are two options on where to search for files:
- Classic: It is the default option for returning search results. If enabled, this methods search for files and folder in the User profile folder only, including Documents, Pictures, Music, Downloads, Videos, and the Desktop.
- Enhanced:This option searches your entire computer, including all hard drives, partitions, libraries, and the desktop.

4. Scroll down the list and select the Add an excluded folder option

5. Select the folder you want to hide, and then click the Select folder button.

You can now close the Settings window. From now onwards, the file or folder you selected will not appear in the search results. If you wish to remove this specific file/folder from the excluded list in the future, follow these steps:
1. Perform steps 1-3 again and locate the targeted file/folder in the list.
2. Click on the three dots associated with it and choose Remove.

Indexing is a Windows service that catalogs information about files, folders, email messages, and other content stored on your computer to improve search performance on your PC. When you add a new file or modify an existing file, Windows automatically updates its index with the file's properties like filename, file type, file's full path, and more.
1. Press Start, type indexing options, and choose the top result.

2. In Indexing Options, press the Advanced button.

3. Next, click the File Types tab

4. In the File Types tab, go through and uncheck the file type you want to exclude from the search. For example, you might want to exclude certain media files like MP3 or MPEG.

5. After deselecting file types, click the Index Settings tab.
6. Click the Rebuild button in the Troubleshooting section to rebuild the search index.Rebuild index

7. The amount of time it takes to rebuild the index will vary based on the number of files on your PC. The more files, the longer the rebuild will take. When the confirmation screen appears, click OK
8. At the top of the Indexing Options window, you’ll see the status of the process.
Once the index is rebuilt, the excluded file types will no longer display in your search results.
How to Hide Files and Folders in Windows 11's File Explorer
To hide specific files/folders in the File Explorer, you can either make changes within the File Explorer itself or use the Command Prompt. Below we have discussed both the methods in detail, so you can proceed with the one you prefer.
1. Launch File Explorer and navigate to the location of the targeted file or folder.
2. Click on the file/folder and choose Properties from the context menu.

3. In the Properties dialog, head over to the General tab and checkmark the box associated with Hidden under the Attributes section.

4. Click Apply > OK.
5. In the next confirmation prompt, click on Apply changes to this folder, subfolders, and files and hit OK again.

This should prevent the file/folder from appearing in the File Explorer. However, keep in mind that the folder options in the File Explorer should be configured to not display hidden files and folders for the steps above to work. You can check if that feature is enabled by following these steps:
1. Head over to any folder in the File Explorer and click on the More button (three dots) on the top.
2. Select Options from the context menu.

3. Head over to the View tab in the Folder Options dialog.
4. Click on the Don’t show hidden files, folders, or drives option and click Apply > OK to save the changes.


No comments:
Post a Comment