Does it bug you when your mouse cursor blocks the view of the text field you’re typing in? If so, you can hide your cursor while typing using one of two methods on your Windows 10 or 11 PC. We’ll show you how.
This tutorial will apply for computers, laptops, desktops, and tablets running the Windows 10 and Windows 11 operating systems
How to Hide Cursor While Typing via Settings
Windows 11 is a new operating system released recently by Microsoft. As the successor to Windows 10, Windows 11 is based on Windows 10 but designed with a different outlook and some changed or improved features. If your PC meets the system requirements for installing Windows 11, you can upgrade your Windows 10 to 11 free.
Both Windows 10 and Windows 11 allow you to hide cursor while typing and you can follow the tutorial below.
On Windows 10
1. Press Windows + I to open Windows Settings quickly. Then select the Devices category.
2. In the following window, select Mouse on the left side. On the right side, scroll down and click Additional mouse options.
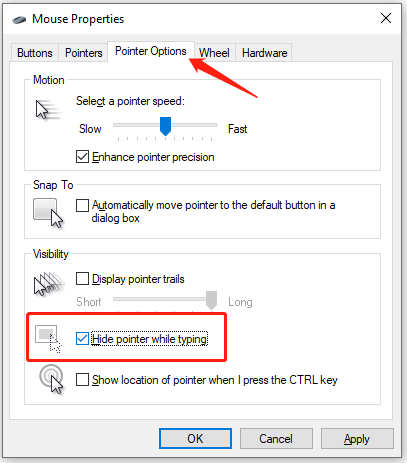
3. In the pop-up window, select the Pointer Options tab and check the Hide pointer while typing option.
4. Click Apply and OK to save the changed settings.
On Windows 11
1. Press Win + I to open Settings.
2. In the left pane, select Bluetooth & devices. In the right pane, select Mouse.
3. Scroll down and click Additional mouse settings.
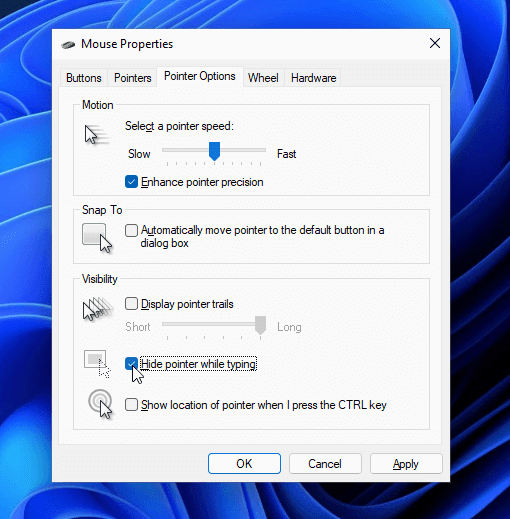
4. In the pop-up window, select the Pointer Options tab and check Hide pointer while typing.
5. Click Apply and OK.
That's it,


No comments:
Post a Comment