Protecting your connections and data integrity is where Secure Shell (SSH) keys excel. SSH keygen is commonly used to gain secure access to remote servers and cloud services. You should have an SSH key if you regularly access remote servers using your Windows device.
Besides remote servers, you can also use these security keys to grant access to your employees at work where you are likely to be exposed to a data breach, e.g. , data center, etc. This article will guide you through easy steps to create SSH keys on Windows.

1. Use Command Prompt
Generating SSH keys with the help of the command line is quick and easy. Follow the steps outlined below.
1. Click the Start button. Search for Command Prompt and select Run as administrator. Click Yes when prompted to let CMD make the changes to your computer.

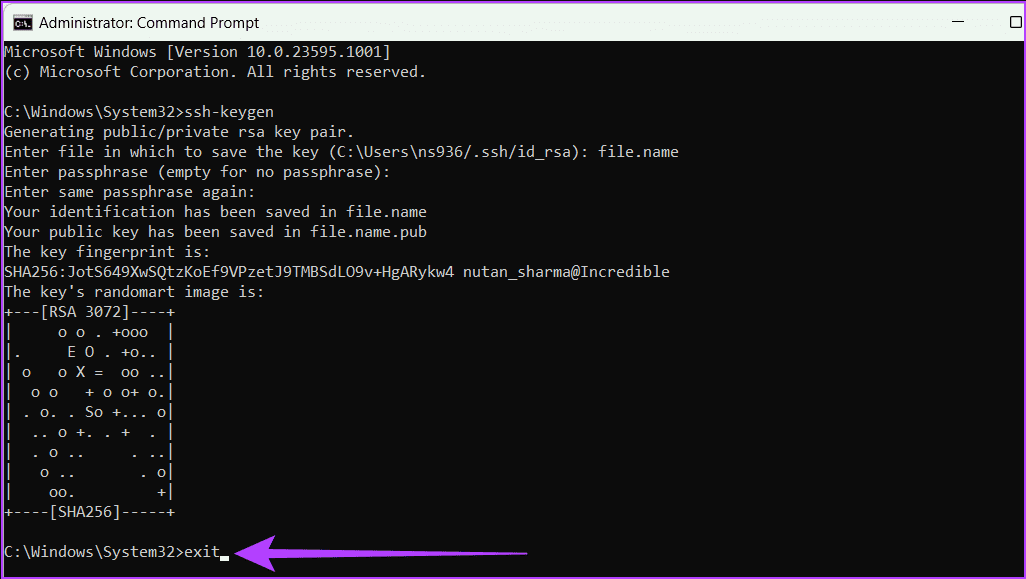
2. Type the following command and press Enter on the keyboard:
ssh-keygen

3. Enter the key storage file name and press Enter:
file_name
Tip: You can also set a custom path here to store the key in the default location (C:\Users\[username]\).

4. Enter the passphrase to secure your key and press Enter to save the changes.
Note: You can press Enter twice to skip this step and save the key directly without a password.
Your private key and public key are securely stored. A confirmation message with additional key information is now displayed on the screen. You can proceed to close this window.
You can use this to generate multiple SSH keys with different file names.

5. Type exit and press Enter on the keyboard to close the CMD window.
2. Use WSL
Generating SSH keys using Windows Subsystem for Linux (WSL) gives you many advantages. You can get the benefits of Linux tools and the ease of working on a Windows computer. Furthermore, it provides a smooth and secure way to handle SSH authentication.
Install WSL and Linux
Follow the steps below to install and set up WSL and Linux distribution on your Windows device.
1. Click the Windows icon and find Command Prompt. Click Run as administrator and select Yes when prompted.
2. Windows 11 comes pre-installed with WSL. You can check it by typing the command mentioned below and pressing Enter.
wsl --status

If you are using Windows 10, install WSL using one of the methods below:
- Microsoft Store
Download Windows Subsystem for Linux (WSL) from the Microsoft Store.
- Command line interface
Enter the command mentioned below and press Enter on your keyboard.
wsl --install
3. After installing WSL on your computer, you can download any Linux operating system using Microsoft Store or command line interface.
The article is using Command Prompt to download Ubuntu for this tutorial. Enter the command below and press Enter on your keyboard to do so.
wsl --install -d Ubuntu
Note: If you want to install Kali Linux, write kali-linux in the command above.

4. Enter UNIX username and password.

5. Close the UNIX window by typing exit and pressing Enter. Repeat the process to close the CMD window.

You have successfully installed WSL and the Linux operating system. To generate SSH key using WSL, follow the steps below.
Generate SSH key using WSL
1. Click on the Windows icon. Search for Ubuntu and select Run as administrator. When prompted, click Yes.

2. Enter the command below to generate SSH key and press Enter.
ssh-keygen -t rsa -b "4096"

3. Provide the desired path and press the Enter key. If not, press the Enter key to save the file in the default location.
4. Enter the passphrase you want to use and press Enter. You need to do this twice to confirm.
Note: You won't be able to see anything you type as you enter your password, but the tool will save it as you type, so make sure there are no typos.
Alternatively, if you don't want to use any passphrase, you can simply press Enter twice.
Warning: You should not use a blank passphrase for security reasons.

5. Finally type exit and press Enter to close the window.

You have successfully created an SSH key. Visit the website where you hosted it to check. There, you will find two keys. You can differentiate them by extension:
- Public keys have the .pub extension.
- Private keys do not have extensions.
Code explanation
A typical SSH command that can help you generate an SSH key is as follows:
ssh-keygen -t rsa -N "" -b "2048" -C "key comment" -f path/root_name
Below is the meaning of each symbol or character in the command.
- -t rsa: Specify the type of key to create, in this case rsa. RSA (Rivest–Shamir–Adleman) is a secure and widely used algorithm for public key cryptography.
- -N “”: Set the passphrase to an empty string, meaning the key will not be protected. Therefore, anyone with access to the private key file can use it without a password.
- -b “2048”: This defines the key size, set to 2048 bits. You should use a larger key size because it provides better security.
Note: Larger key sizes will take longer to create and use.
- -C “key comment”: Allows you to add comments to the generated key file. This can be useful in real-life situations because you will be working with multiple SSH keys to access different remote devices.
- -f path/root_name: Specify the path and file name for the generated key pair. The file name will have root_name provided with the extension .pub for the public key and .pem for the private key (for example: root_name.pub and root_name.pem).
3. Use PuTTY
PuTTY is one of the old-fashioned free and open source terminal emulators, serial console and network file transfer applications. It supports several network protocols, including SSH, Telnet, rlogin, and raw socket connections. Follow the steps described below to generate SSH keys on Windows using PuTTY.
1. Launch a web browser and visit the official PuTTY website. Download and install PuTTY.
2. Press the keyboard shortcut Windows + S to open Windows Search, type PuTTYgen and click Open.


4. Click Save public key and choose a location to save the file. Rename the file using the key type and add the “.pub” extension (e.g. id_rsa.pub for RSA).

5. Finally, enter the passphrase and confirm it. Go to the Conversions tab at the top and click Export OpenSSH key for the private key.
6. Choose a location to save the private key and remember that no extension is used after the file name. Furthermore, you should use a name similar to the public key (e.g. id_rsa).


No comments:
Post a Comment