Connecting multiple monitors or display devices to a computer is a surprisingly simple task. Physically, connecting the devices is relatively simple, but you'll need to configure a variety of options to customize the display to your personal needs.
You'll need to arrange the proper layout for navigating between screens, configure the correct size and resolution for each, and define the home screen. Failure to do so will result in your desktop becoming more unwieldy and lacking in functionality.

Connect multiple monitors in Windows 11
You can connect multiple display devices to your laptop or desktop using the ports available on your computer. There are several different types of connectors you can use, and the type of connector you choose will largely depend on the port each device has.
To get started, check the back of your monitor and the back, front, or side of your laptop or desktop computer. The two main types of connectors you may come across are High-Definition Multimedia Interface (HDMI) connectors and Digital Visual Interface (DVI) connectors. They serve similar purposes; slightly different, however.
The HDMI cable carries both visual and audio information from a desktop or laptop computer to the display device. Most modern monitors have an HDMI port on them, allowing for easy connection to a computer. One of the coolest features an HDMI port offers is the ability to set up multiple monitors from a single HDMI port.
The next common connection type that you may see is a DVI connection. These connections are similar to HDMI connections, but they do not carry audio, only video. That means if you use a DVI connection to connect your computer to a monitor, you'll need a separate connector for audio transmission.
Today, most monitors and TVs have either a DVI port or an HDMI port (most computers have an HDMI port). If necessary, you can buy an adapter to convert the HDMI port to the DVI port or vice versa.
Access Display Settings on Windows 11
Once you have all the devices you want to connect to your computer, you can access the display settings. On Windows 11, this is a pretty straightforward process.
Right-click anywhere on the desktop to bring up a context menu with various system options in it. Near the bottom of the list, you'll see an option labeled Display Settings. Click it to see the Windows display options.

From here, you can adjust all your display settings. These include properties such as brightness, dithering, resolution, and settings for multiple monitors. As long as you have multiple monitors connected, the first part you see will handle managing multiple monitors.
Device configuration on Windows 11
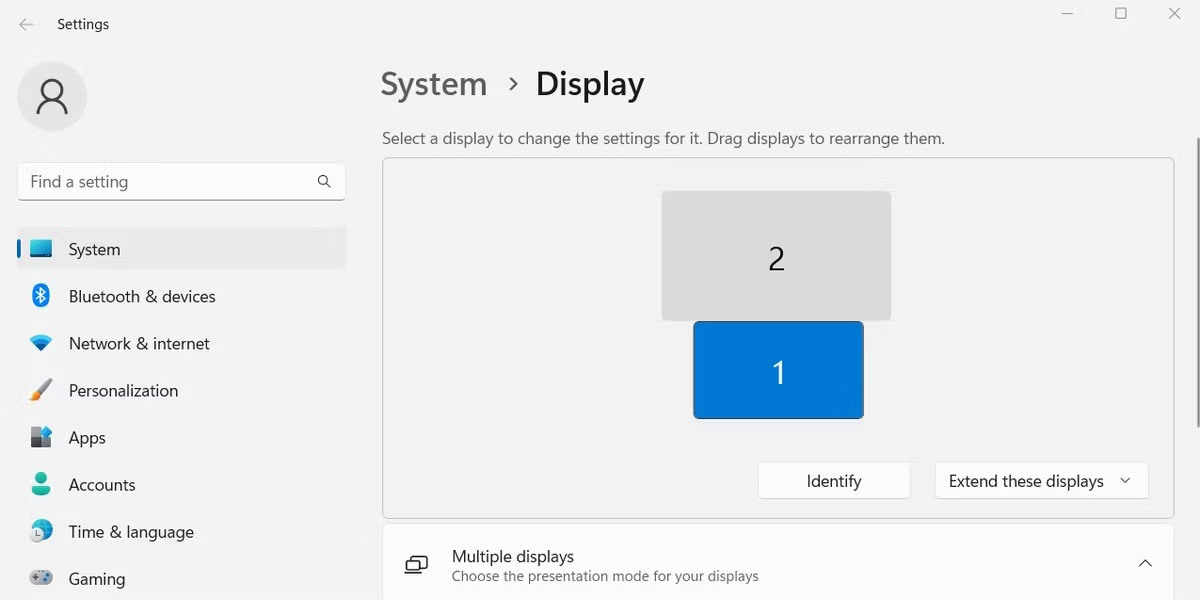
There are several settings you can choose to manage for your new display. In the first section, you will see all connected displays displayed with large numbers above. Clicking any number will make the corresponding screen active. Adjusting any of the settings below will affect the selected display.
Home screen
The first option that affects your display is to select the home screen. All other screens are positioned and oriented according to the main screen. In addition, many applications will prioritize launching on the home screen.

To swap your home screen from one device to another, you need to select the display you want at the top of the window. Once you've selected the right display, you'll see that the first checkbox in the settings is activated.
Selecting the checkbox labeled Make this my main display will convert the selected display into your main display.
Screen position
Once you have selected your home screen, you can configure the location for each screen. All positions are arranged according to the main screen. To rearrange the display, drag and drop the boxes at the top of the display window.
Each screen is represented by a specific number. If you're not sure which monitor it is, you can select any monitor and click the Identify button. An indicator appears on the selected screen.
After arranging the screens, you'll want to try to place them as close to reality as possible. Otherwise, your mouse will not move smoothly from one screen to another.
Reflect and expand
Another setting that you can adjust from the Display settings screen is the behavior for each monitor. At the bottom right of the top section, you'll see a drop-down menu containing options like Extend these displays and Duplicate these displays.

Selecting the Extend option will make the displays act as a single, continuous display. Select the Duplicate option to make this display mirror the content displayed on the currently selected home screen.
Specify screen orientation
Further down the list of settings for each monitor, in the Scale & Layout section, is an option to change the orientation of the screen. This allows you to change the position of the bottom part of the screen, allowing you to rotate your Windows display device 90 degrees.
You can change the orientation of the screen to display the content in portrait mode instead of landscape.
Screen size
In general, most modern display devices are excellent at conveying their relative size and preferred resolution. Most display devices can determine the best settings based on their display type.
However, at times, it may be necessary to reset some specific settings to fix potential display problems.

The first two options in Scale & Layout allow you to adjust the scale of the selected screen and the device's resolution. These settings are managed at the per-device level, meaning you can adjust the display for a single display without affecting the other displays.


No comments:
Post a Comment