On Windows 11, you can create a local account to avoid using a Microsoft account, which means your settings and files will only be available locally on your device for a more secure and private experience.
Typically, you'll want to set up a device with a Microsoft account as it offers more benefits like seamless integration with different services and files and settings that sync across devices. However, if you feel that the cloud-powered account type isn't for you, you can create a local account that doesn't connect to Microsoft services using the Settings app, Command Prompt, and PowerShell.

A. Create a Local User Account With Netplwiz
Netplwiz is a free utility for helping you manage your user accounts in Windows. Think of it as a Control Panel for user accounts.
You can add new accounts, remove old ones, change or remove passwords, tweak the accounts type, and so on.
1. Go to the Start menu search bar, type in netplwiz, and select the Best match.
2. In the netplwiz window, you’ll see the primary account on top. To set up a new account here, click on Add.
3. In the dialog box, click on Sign in without a Microsoft account (non-recommended).
4. Click on Local account and to go head with the account creation.
5. Enter a new username and password, and click on Next.
6. Click on Finish to finalize your account creation process.
Once you have completed these steps, your account will be successfully created and you will be returned to the User Accounts tab. The newly created account will be in the list of accounts there
2. Create a Local Account with Windows Settings
Another simple method in our arsenal, you can access the Settings app and create your local account in a few steps.
1. Press Windows Keys + I together to launch the Settings app. Alternatively, go to the Start menu search bar, type in settings, and select it
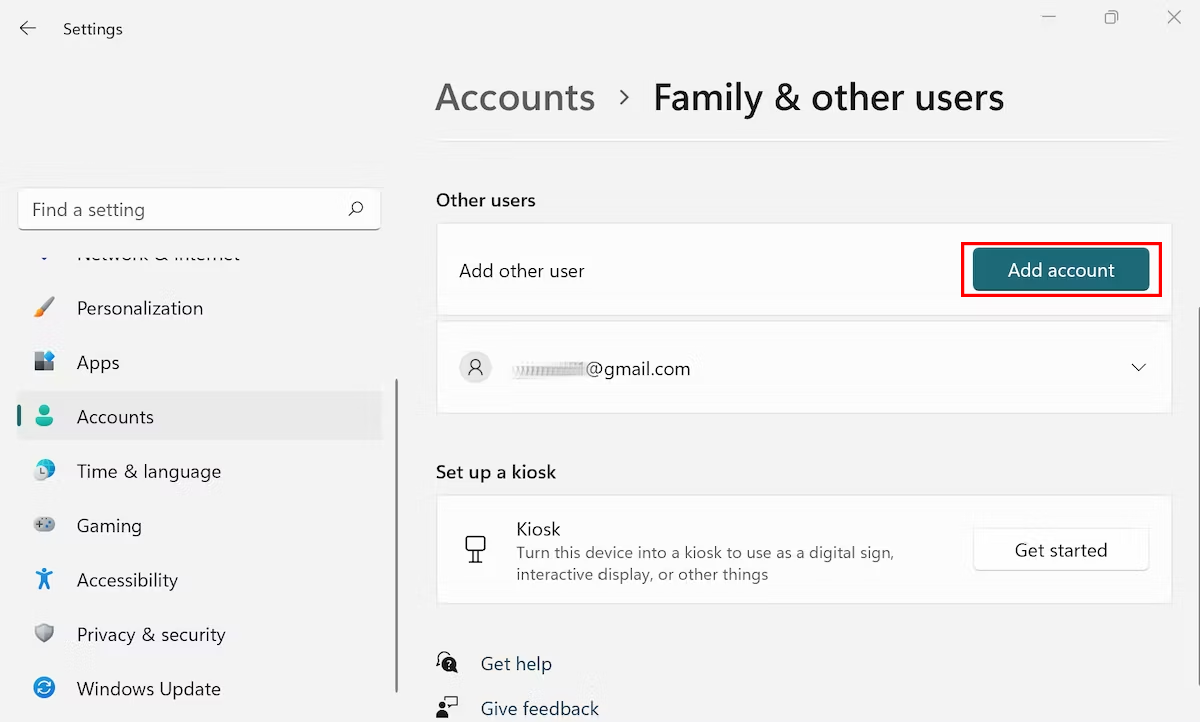
2. Navigate to Accounts > Family & other users, and click on Add account to add other user.
3. In the new dialog box, select the I don’t have this person’s sign-in information option.

4. Now click on Add a user without a Microsoft account and select Next.
5. You’ll then get asked to set up the credentials for your new account. Enter a relevant username and set a strong password. Subsequently, set up relevant security questions to retrieve your password in case you forget it.

6. Finally, click on Next again, and your account will be created.
Once you have followed the above steps correctly, your account will be created in a few seconds. You will then be taken back to the Settings menu, where you can see the new account along with the others.
Note: Make sure you enter a password that you can easily recall later to avoid any account access problems. If you use a home PC, we recommend that you make a note of it and keep the password somewhere safe. While there are ways to get your account back in the event of a password loss, it's better to be prepared for situations like these.
3. Create a Local User Account With Command Prompt
The Command prompt is a free text-based interpreter available in all the Windows operating systems. It works by taking inputs for the keyboard and then executing the tasks based on these inputs.
You can create a local user account with the help of the Command Prompt.
1. Head to the Start menu search bar, type in command prompt, and you’ll see the icon for Command Prompt. Now run the Command Prompt as an administrator by right-clicking it and selecting Run as administrator.

2. An elevated Command prompt will be launched. Type in the following code in the command line and hit Enter:
net user username password /add
3. In the above command, replace the keywords username and password with a relevant username and password of your liking. Also, make sure you’ve stored the password at a proper place. Because unlike in the Settings methods above, here you don't get an option to set security questions. So if you forget the password, you would've no way to access it again.

If you've followed the above steps and a local user account will be created instantly. If you see something like, "The command completed successfully,” as shown above, then you can feel rest assured that a new local account has been created. To verify the account, go to the Start menu and click on your profile. You'll see all the additional accounts there, along with your newly created account.
4. Create a Local User Account With Computer Management
If you’re running the Pro version of Windows instead of the popular, basic Home version, then you can use Computer Management for adding a local user account.
Computer Management is a collection of administrative Windows tools that let you manage a local or remote Windows computer. Apart from app management and monitoring, you can also optimize your Windows sessions and view system properties with Computer Management.
1. Go to the Start menu search bar, type in computer management, and select the best match.
2. Select System Tools > Local Users and Groups section from the left corner.
Now right-click on Users > click on New User.
Now fill in all the relevant credentials for your new account; choose a suitable username and password, and a new account will be created instantly.
Video:


No comments:
Post a Comment