Windows 11 comes with an advanced setting, called Hardware Accelerated GPU Scheduling, which can boost gaming and video performance by optimizing GPU power. on PC. Let's learn more about this useful feature right here.
What is Hardware Accelerated GPU Scheduling?
Normally, a computer's processor (CPU) will be responsible for loading some graphic and image-intensive data into the GPU for processing, so that games, multimedia, and applications speak for themselves. in general can run smoothly as well as display more beautiful. The CPU collects frame data, assigns commands, and prioritizes each specific process so that the GPU can process and display them efficiently.
With Hardware Accelerated GPU Scheduling, the processor and GPU scheduling memory (VRAM) do the same job to render high-quality frames. In this way, the GPU can share less work with the CPU, or in other words "offload" the CPU, thereby helping to reduce latency and improve the overall performance of the PC.

Requirements to use Hardware Accelerated GPU Scheduling
Hardware Accelerated GPU Scheduling was first released with the Windows 10 May 2020 Update, but is not enabled by default on Windows 11, but requires users to enable it manually. In addition, to take advantage of this feature, your computer needs an NVIDIA (GTX 1000 or later) or AMD (5600 series or higher) graphics card, with the latest graphics drivers.
In addition, there is still no "universal formula" for how to combine specific hardware (CPU and GPU) to create the most optimal performance when used with Hardware Accelerated GPU Scheduling. So things can change depending on your PC's CPU, GPU and graphics drivers.
A. Enable Hardware-Accelerated GPU Scheduling using Settings
1. Open Settings on Windows 11.
2. Click on System.
3. Click the Display page on the right side.
4. Under the Related settings section, click the Graphics settings option.

5. Click the Change Default Graphics Settings option.

6. Turn on the Hardware-Accelerated GPU Scheduling toggle switch to enable the feature on Windows 11.
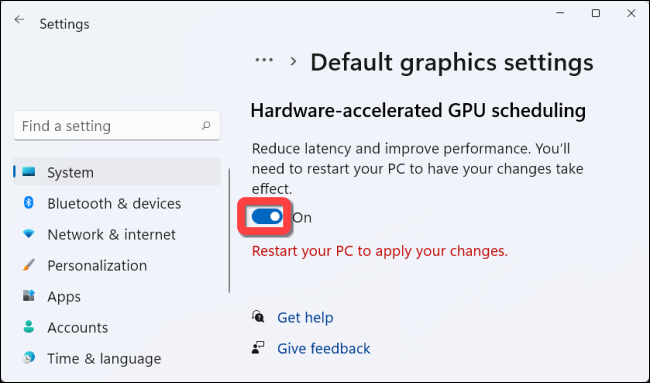
7. Restart your computer.
Video:
Once you complete the steps, the new option should apply, and you should be able to see better latency and performance playing games.
B. Enable Hardware-Accelerated GPU Scheduling using Registry
Note: It’s important to note that modifying the Windows Registry can cause serious problems if not used properly. It’s assumed you know what you’re doing and that you have created a full backup of your system before proceeding.
1. Open Start. Search for regedit and click the top result to open the Registry Editor.
2. Browse the following path:
HKEY_LOCAL_MACHINE\SYSTEM\CurrentControlSet\Control\GraphicsDrivers
3. Right-click the GraphicsDrivers (folder) key, select the New submenu and click on DWORD (32-bit) value.
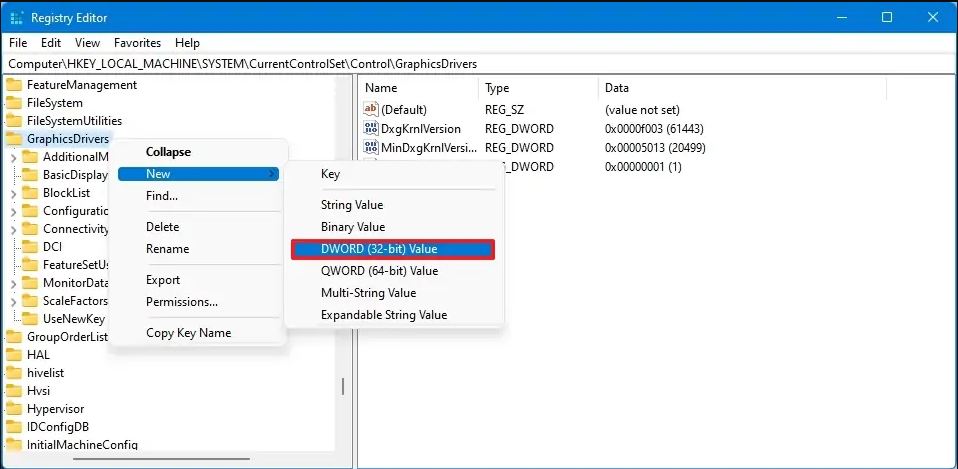
4. Name the key HwSchMode and press Enter.
5. Double-click the newly created key and sets its value from 0 to 2.
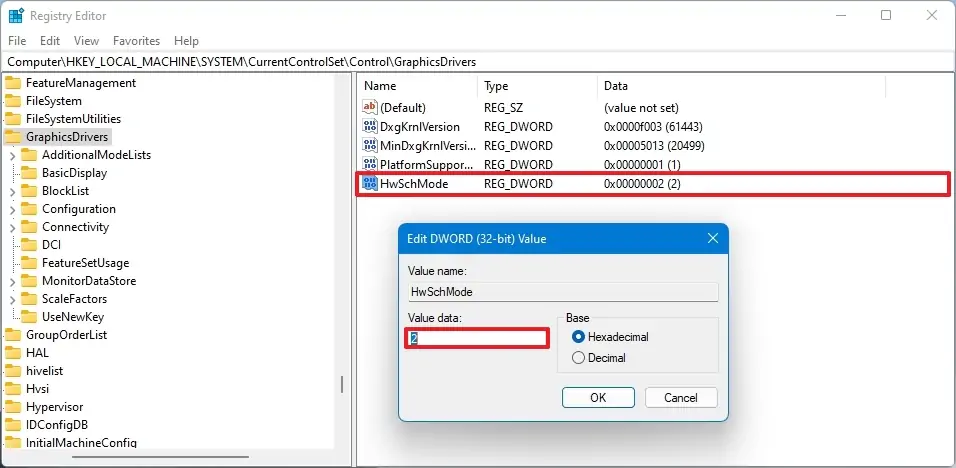
6. Click the OK button. Restart your computer.
After you complete the steps, Hardware-Accelerated GPU Scheduling should now be enabled on the computer.
If you want to revert the changes, you can use the same instructions, but on step No. 4, right-click the HwSchMode key and select the Delete option. If the key was already available, you could change its value from 2 to 1 to disable Hardware-Accelerated GPU Scheduling.


No comments:
Post a Comment