To run a program, software, or application on Windows 11/10, you need to install it first. Installing a program is usually done in the root directory, where the operating system is located, and that is the C drive for most of us. But what if your C drive starts full of programs and games that you keep installing? There is nothing you can or should delete from C drive as it contains all Windows operating system files or program files and deleting any wrong folder will cause your computer to misbehave. To free up space on your C drive, the only option left is to move installed programs to another drive in Windows 11/10.
Fortunately, Microsoft has thought of this and designed a built-in utility that allows users to move all modern applications to another drive. After these programs are shipped, there are no problems with the operation of these programs. However, this feature is a bit complicated and not always guaranteed for traditional desktop programs. Here are the steps to move installed applications to another drive in Windows 11/10.
How to Move Windows 11/10 Apps to Another Drive
1. Press Windows Keys + I to open Settings.
2. Click Apps > Apps & features. Here you will find a list of all apps and programs installed on your system.
3. Scroll to the app that you want to move.
On Windows 10, select the app from the list.
On Windows 11, click the three vertical dots.
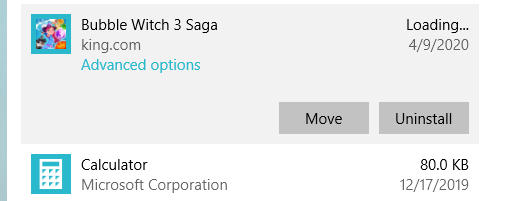
4. Click Move.
5. Select the new drive from the dropdown.
6. Click Move again.
7. Repeat this process for all the apps you want to move. There is no way to select multiple apps and move them in one go.
You might observe that the Move button for some of the apps would be greyed out. This means that a particular app cannot be moved.
Note: These steps can be followed to move the program back to its original location as well.
Video:
How to move installed programs to another drive in Windows 11/10 - Windows Default Applications
Microsoft has disabled the Move button in some default programs because those applications are system applications and they require running system files located in the Windows Operating System folder. Moving these apps may cause them to misbehave. However, there is a third-party software that can move installed programs to another drive in a Windows 11/10 computer.
The proposed program is called Steam Mover, developed by Steam Games to move installed game files between different drives. However, this program works on all programs and can move installed programs to another drive. There is a limitation to using Steam Mover, the fact that it only moves installed applications from one NTFS drive to another. It does not support any other disk formatting system like FAT or APFS.
To check NTFS:
1. Press Windows Key + E to open Windows Explorer, then navigate to This PC.
2. Right-click a drive and click Properties.
3. Refer to the File system to see if it's NTFS.
1. Open Steam Mover.
2. Next to Steams Apps Common Folder, click the three-period button to select the folder path on the drive containing the programs you want to move (for example, your Program Files on the C drive).
3. Next to Alternative Folder, click the three-period button to select the drive and folder path where you want to move the program to.
4. Select the program from the list that you want to move. You can select multiple programs by holding Ctrl as you click.
5. When ready to move, click the right arrow at the bottom to begin. Command Prompt will open and process the move.
6. When complete, you'll see the new folder path next to the program in the Junction Point column.
How to Change the Default Installation Path of Apps and Programs on Windows 11/10
1. Press the Windows Key + I to open Settings.
2. Click System > Storage.
On Windows 10, underneath the More storage settings heading, click Change where new content is saved.
On Windows 11, click Advanced storage settings > Where new content is saved.
3. To change the default drive for new apps, use the New apps will save to dropdown.
One of the most important reasons to move installed programs to another drive in Windows 11/10 is to free up space in the main drive where the Windows Operating System is installed. drive so that the system runs smoothly and without interruption? Windows uses that space in the case of hibernation because it creates a Hiber.sys or Pagefile.sys file to store the contents of RAM when it is overloaded. So it's important to keep the main drive free of space and move third-party programs and Windows Store apps to another drive. However, I don't recommend moving the default Windows apps anywhere else.
For any questions or suggestions, feel free to let us know in the comments section below. We'd love to get back to you to come up with a solution. We post regularly about tips and tricks along with solutions to common tech-related problems.


No comments:
Post a Comment