Most users reported high latency after upgrading Windows 10 causing problems during gaming sessions. User reports suggest that ping spikes are common. High ping usually affects WiFi connections but has also been reported on Ethernet connections. During high ping, packet loss occurs, which can be a problem if you are watching online videos or games. In this article, we have discussed solutions to fix ping spike in Windows 10/11. Before starting this troubleshooting, make sure that your Windows OS and system drivers are updated using Windows Update.

A. Modify the registry
1. Press Windows + R and type regedit to open the Registry Editor.

2. Before making changes in the Registry, make a backup. Click File -> Export.
3. Select Export Range as All and give the desired file name. Choose a location and click Save. This file can be run to restore the registry to its original state if anything goes wrong.

4. Navigate to the key below:
HKEY_LOCAL_MACHINE\SOFTWARE\Microsoft\WindowsNT\CurrentVersion\Multimedia\SystemProfile
5. In the right pane, double-click NetworkThrottlingIndex DWORD.

6. Set the Value Data field to FFFFFFFF and click OK to save the changes.

7. Now navigate to the key below:
HKEY_LOCAL_MACHINE\SYSTEM\CurrentControlSet\Services\Tcpip\Parameters\Interfaces
8. Select the subkey that represents your network connection. Usually, the correct subkey is the one with the most information like IP address, gateway, etc. your.
9. Right click on the subkey and select New -> DWORD (32-bit) Value.

10. Name the DWORD as TCPackFrequency. Double click it and set the Value Data field to 1.

11. Similar to step 9, create another DWORD and name it TCPNoDelay.
12. Double click the DWORD above and set the Value Data to 1.

13. Navigate to the following key:
HKEY_LOCAL_MACHINE\SOFTWARE\Microsoft\MSMQ
14. Create a new DWORD and name it TCPNoDelay.
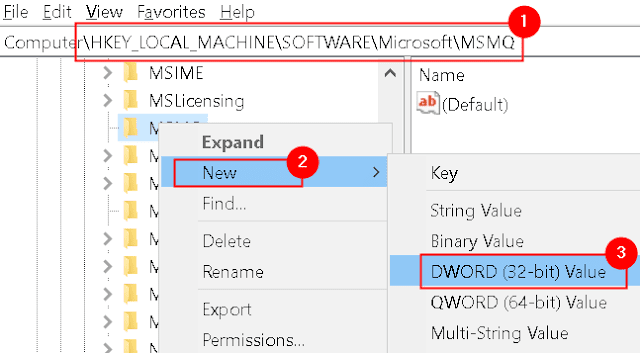
15. Set its Value Data to 1.

16. Expand the MSMQ key and select Parameters.
17. If the Parameter key is not available, right click on the MSMQ key and select New -> Key.
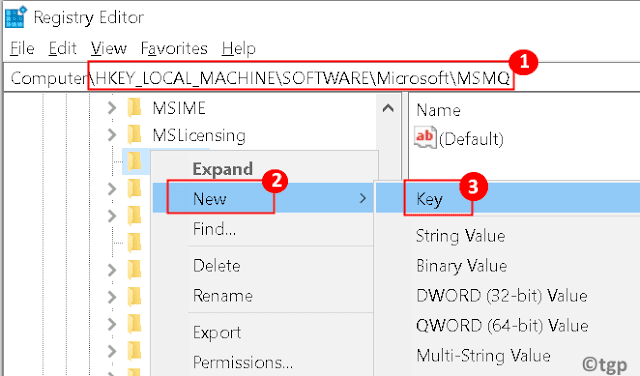
18. Enter the Parameter as its name.
19. In the Parameter key, create a new DWORD named TCPNoDelay.

20. Set the Value data for the new DWORD TCPNoDelay to 1.

Once you have made the changes in the registry, check if the ping spike problem is resolved.
Video

netsh wlan set autoconfig enabled=yes interface=<Name of your Wireless Connection>

C. Run Troubleshooter
1. Press Windows + I to open Settings. Go to Update & Security
2. On the left side, select Troubleshoot.
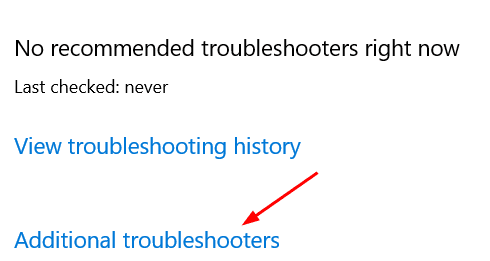
3. Click Additional Troubleshooter in the right pane.
4. Locate the network adapter and click the Run the troubleshooter button.

5. Once the troubleshooting is complete, reboot your system and see if the problem is resolved.
D. Update/Uninstall network drivers
1. Press Windows + R and type devmgmt.msc to open Device Manager.
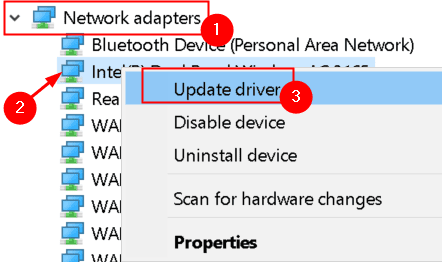
2. Expand Network Adapters.
3. Right click on your network adapter and select Update Driver.
4. Click on Search automatically for available drivers.
5. Wait for the update to complete and see if it solves the problem.
If the problem persists after the update, then you need to try uninstalling and reinstalling the network adapter.
1. Press Windows + R and type devmgmt.msc to open Device Manager.
2. Expand Network Adapters.
3. Right click on your network adapter and select Uninstall device.

4. Click Uninstall to confirm the uninstall process.

5. Exit Device Manager and reboot your system.
6. On startup, Windows will detect the network adapter and reinstall it. Check if this fixes the problem.
E. Disable Energy Efficient Ethernet
1. Press Windows + R and type devmgmt.msc to open Device Manager.
2. Expand Network Adapters.
3. Right click on your adapter and select Properties.

4. Go to the Power Management tab.
5. Uncheck the box next to Allow the computer to turn off this device to save power option.

F. Change How Windows Delivers Updates
1. Press Windows + R to open Run. Type ms-settings:windowsupdate to open Windows Update Settings.
2. Click Advanced options in the right pane.

3. Select Delivery Optimization (or Choose how updates are delivered in earlier versions of Windows 10).

4. Turn off the Allow downloads from other PCs. You'll get updates and apps directly from Windows Update and from the Microsoft Store with Delivery Optimization; however, you will not download or upload to other PCs.

Additionally, you can also toggle metered connections to improve your latency. If your connection is set as a metered connection, you will prevent unwanted background downloads because Delivery Optimization will not automatically download or send portions of updates or apps to Other PCs on the Internet.
1. Open Run by pressing Windows + R together. Type ms-settings:network-wifi to open WiFi settings.
2. Click Manage known networks.

4. Select your WiFi network and click the Properties button.

5. Find Metered Connection and turn it on.


- 802.11n channel width for 2.4GHz connections: only 20MHz
- Priority band: 2.4GHz
- Roam Aggression: 1
- Wireless mode: 802.11b/g


No comments:
Post a Comment