The StartupCheckLibrary.dll file is a system file located in the System32 folder. After installing the update on Windows, you can see where this error message comes from - the error message 'There was a problem starting StartupCheckLibrary.dll' on your computer. The file itself can cause this error if it is corrupted in the first place. Try these fixes to solve the problem on your computer.

A. Delete the StartupCheck task
1. At first, press Windows Key + S together. Type Task Scheduler in the search box and click Task Scheduler.
2. When the Task Scheduler opens, go to this location on the left pane,
Task Scheduler > Microsoft > Windows > Application Experience
3. On the right side, check the StartupCheckLibrary task.
4. Then right click on the specific task and click Delete to remove the task from your system.

5. Then go to this location
Task Scheduler > Microsoft > Windows > WDI
6. On the right side, see if you can find the task SrvHost.
7. If you can find it, right click on it and click Delete to remove it.

Once you've done all of this, close the Task Scheduler window.
Video:
B. Add dll file to exclusion list
You can add this file to the exclusion list so that the StartupCheckLibrary.dll file is no longer quarantined in the future.
Note: We have already explained the steps in Windows Security. If you have dedicated anti-virus software installed on your system, then the method is almost the same.
1. Press Windows Key+ S together and then type Windows Security. Then, click Windows Security.

2. Then click home icon and then click Virus and threat protection.

3. Scroll down in the Windows Security window to locate Virus & threat protection settings.
4. Then, click Manage Settings.

5. Click Add or remove exclusions.

6. Scroll down until you locate the Exclude option. Click Add exclusion.
7. From the drop-down menu, select the File type.

8. Now, navigate to this location -
C:\Windows\System32
9. Then select the file StartupCheckLibrary.dll. Click Open.

10. You will notice that the application has appeared in the list of excluded applications.
Close the Windows Security window.
This will ensure that Windows Security does not isolate the 'StartupCheckLibrary.dll' file from your computer.
C. Check protection history
1. Disconnect your computer from the Internet.
2. Write Windows Security in the search box in the lower left corner. Then, click Windows Security.
3. Under Windows Security, click “Virus and threat protection”.

4. Then, click Protection history to check if the anti-virus program has deleted the dll file.

5. If you see StartupCheckLibrary.dll in the list of quarantined files, there are two situations you can face-
a. If the file's address is C:\Windows\System32, click the quarantined file and click Action. Finally, click Allow on device to allow the dll file on the device.

b. If you find that the quarantined file is not from the folder - C:\Windows\System32, it could be malware/trojan and it's better to leave it there.
This will restore the dll to its correct location.
You can use AutoRuns to determine if StartupCheckLibrary is running at startup and disable it accordingly.
D. Use AutoRuns
1. Visit this website https://docs.microsoft.com/en-us/sysinternals/downloads/autoruns. Here, scroll down and click Download Autoruns and Autorunsc to download the tool.

2. Unzip the downloaded Autoruns package in a location of your choice,
3. Once you have extracted the file, go to the location where you extracted it.
4. Right click on Autoruns64/32 bit and then click Run as administrator.

5. In the AutoRuns License Agreement window, click Agree to agree to the license agreement.
6. When the Autoruns screen appears, click the box next to Filter:
7. Then write StartupCheckLibrary in the box to see the list of processes using the dll.

8. Once you have viewed the processes, right click on the process that is using the dll file, then click Delete to delete it.

Once you have removed the process from your computer, close the Autoruns window.
Restart your computer.
E. Uninstall Windows Update
Step 1 - Uninstall Older Windows Update
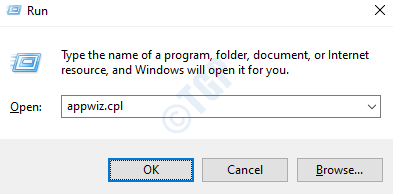
1. At first, Press Windows Keys + R. Then type appwiz.cpl and click OK.
2. After the Programs and Features window opens, click View installed updates.

3. Now just scroll down to find the most recent update that may have caused the problem.
4. Right click on it and click Uninstall.

This will uninstall the update from your computer. Restart your computer.
Step - 2 Install updates from MCT
1. Just go to the Microsoft Software Downloads page. Then, click Download Tool now.
2. Choose a location to save the file and then, click Save to save the package.
3. Once the download is complete, go to the file location. Then double click on MediaCreationTool2004.

4. Click Accept to accept the terms and conditions.
5. Click the radio button next to, Upgrade this PC now. Then, click Next to start the upgrade process.

This will download the latest version of Windows for your computer and install it. Your computer may restart a few times.
F. Run the SFC test
1. First, you have to type cmd in the search box. Then, right-click Command Prompt and click Run as administrator.
2. Then enter this code and press Enter to run a scan of the system files.
sfc / scannow

This check should fix the problem on your computer. Reboot the system once.


No comments:
Post a Comment