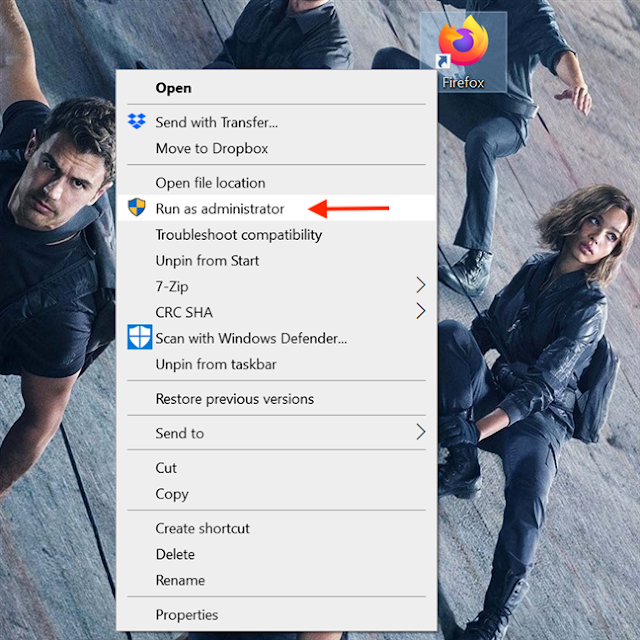
As needed, you can create a shortcut with admin privileges to allow standard users to run programs that require admin privileges.
In Windows, you can create custom shortcuts for almost any file, folder, or program. In general, shortcuts do not give you any admin rights. But there are situations where you need to allow other users on the system to run programs that require admin privileges. In these cases, you do not need to provide an admin password. Instead, you can create a custom shortcut with admin privileges to allow a standard user to run the program as admin.
Alternatively, if you don't want to see the UAC prompts, you can completely avoid them by creating shortcuts with admin mode. Following are the simple steps for creating a shortcut with admin privileges and for a standard user to run the program as administrator.
Note: Before moving on to the next section, find the computer name, username and password of the admin account. You will need this information in the next steps.
A. Activate the Admin account
By default the Admin account is disabled, so you must enable the Admin account.
1. On the Search Start Menu box, type Command Prompt, then right-click the Command Prompt shortcut and select Run as administrator.
2. Enter the following command in the Command Prompt window to activate the Admin account:
net user administrator /active:yes
3. The Admin account is activated, but the account is not password protected.
To set up an administrator account password, open Control Panel and then select Accounts and Family Safety => User Accounts.
On the User Account window click Manage another account.
4. Select Administrator account, select Create a password and then proceed to create a password for the Admin account.
B. Steps to create shortcut with admin privileges
Creating shortcuts with admin privileges for programs allowing standard users to run it as admin is easier than you might think. The best thing about the method below is that you don't have to give the admin password and the admin permissions are limited to the program. Just follow the steps as follows.
1. As with any custom shortcut, you can create it directly on the desktop. Just right-click on the desktop and choose New> Shortcut.
2. In the blank field, copy and paste below code. Replace ComputerName with the actual computer name, Username with the actual username, and the illustrated file path with the actual path of the exe file for the target program.
runas /user:ComputerName\Username /savecred "C:\dummy\path\to\file.exe"
3. Click the Next button.
4. In this window, give the shortcut a name. You can name the shortcut with whatever you want. Then, click the Finish button.
5. After creating the shortcut, double click it. For the first time, you will be prompted to enter the admin password. Enter the password and press Enter.
6. If the username and password are correct, the shortcut will be executed and the program will be launched as admin.
Username and password are automatically saved in Windows Credential Manager. Therefore, other users do not have to enter a password. Instead, Windows will automatically extract the password from Credential Manager and launch the application.
If you no longer need a user to launch the app as an admin, delete the shortcut.
C. Create a shortcut to open the application with admin privileges manually in Task Scheduler
1. Press the Windows Keys + R to open the Run dialog, type taskchd.msc into Run and click OK to open Task Scheduler.
2. Click Task Scheduler Library to the left of Task Scheduler and click Create Task in the Actions section on the right.
3. In the General tab, enter the name (eg "Elevated command prompt") you want for this task and enter the optional description of the task.
4. On the General tab, select the Run with highest privileges box.
5: On the General tab, select Windows 10 in the Configure for drop-down menu.
6: Click the Actions and select New.
7: Enter cmd.exe in the Program/script.
This is what is being used to open the shortcut with admin privileges, so it cannot be changed to anything else.
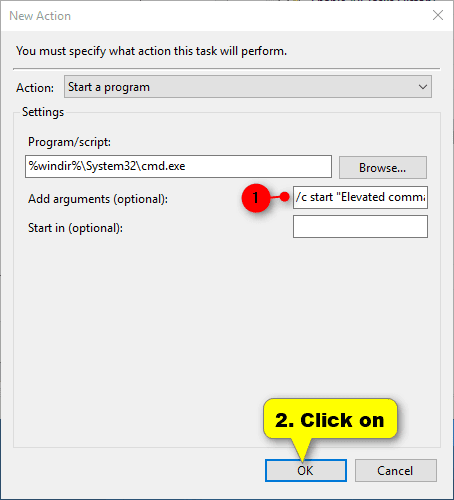
8. Enter the command below in the Add arguments field and click OK.
/c start "Task Name" "Full path of application file"
Replace Task Name in the above command with the task name (eg "Elevated command prompt") you used in step 3 above.
Replace the Full path of application file in the above command with the actual full path of the application file you want to run with admin privileges.
For example:
/c start "Elevated command prompt" "%windir%\System32\cmd.exe"
9. Now, you should see this new action listed.
10. Click the Conditions tab, uncheck the box Start the task only if the computer is on AC power and click OK.
11. You should now see this new task listed in the Task Scheduler Library. You can now close Task Scheduler if you want.
12. Right-click or press and hold on the desktop, select New and click Shortcut.
13. Enter the command below in the location field and select Next.
schtasks /run /tn "Task Name"
Replace Task Name in the above command with the task name you used in step 3 above.
For example:
schtasks /run /tn "Elevated command prompt"
14. Enter the desired name for this shortcut of the task and click Finish.
15. Right-click or press and hold the new desktop shortcut and select Properties.
16. Click the Change Icon button in the Shortcut tab.
17. Click OK.
18: Click Browse, navigate to and select the application file (eg "%windir%\System32\cmd.exe") you want to run as admin, click Open, select the icon you want for the shortcut and press OK.
You can use any icon you want for this shortcut.
19. Click OK.
20. You can run at startup, pin to taskbar, Start menu, add to All apps, Quick Launch, assign shortcut or move this shortcut to a place you like for ease of use.
D. Automatically create app opening shortcut with admin privileges using script
1. Download the file Create_an_eleised_shortcut.bat.
2. Save the .bat file to the desktop.
3. Unblock the .bat file.
4. Double-click the Create_an_eleised_shortcut.bat file to run it and click Yes if prompted by UAC.
5. Enter the name (eg "Elevated Command Prompt") you want to use for the shortcut and the task name, then press Enter.
6. Enter the full path of the application file without the quotes (eg "%windir%\System32\cmd.exe") and press Enter.
7. A shortcut will now be created on your desktop using the default application icon with the name you provided in step 5. This will be the shortcut to open the application with admin privileges.


No comments:
Post a Comment