There are quite a few things which may cause this problem and you will need to adapt to the situation and try out the methods best suitable to your situation. If you are having boot issues, this command may be the most helpful and it’s hard to replace it.
Windows 10 Installation Media
A Windows 10 installation media is essential to this method. If you don’t have a Windows 10 installation media, you need to follow the steps below to create one on a normally running computer at first.
1.Prepare a USB drive with at least 8GB disk space.
2.Click here to download the Windows 10 Media Creation Tool from Microsoft.
3.Insert the USB drive into a normally running computer, run Media Creation Tool on it and accept the Microsoft software license terms.
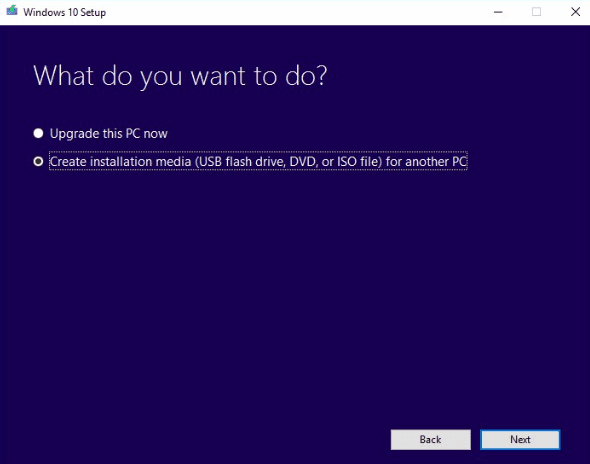
4.Choose Create installation media (USB flash drive, DVD, or ISO file) for another PC and click on Next.
5.Choose Use the recommended options for this PC and click on Next.
6.Choose USB flash drive and click on Next.
7.Choose your drive from the list and click on Next.
The tool will start to create a Windows 10 installation media to your USB drive. When the process is finished, a message which reads Your USB flash drive is ready will pop up. Click Finish to exit and pull the USB drive out.
The Windows 10 installation media is created.
Method 1: Fix Bootrec /Fixboot Access Denied Issue with a Windows 10 Installation Media
1Insert the USB drive that contains the Windows 10 installation media into your computer and reboot it.
2.Boot your computer from USB.
3.At the startup, click on Repair your computer
4.Choose Troubleshoot and then click on Advanced options.
5.Click on Command Prompt.
6. Type the following commands into Command Prompt and hit Enter to run them one by one:
- Diskpart
- sel disk 0
- list vol
- sel vol
- assign letter=:
- exit
- cd /d :\EFI\Microsoft\Boot\
- bootrec /FixBoot
- ren BCD BCD.old
- bcdboot c:\Windows /l en-us /s : All
After you finished this process, try to run the "bootrec /fixboot" command in Command Prompt again to see if “access is denied” is gone. If no, keep on reading to try the next method.
Method 2: Run CHKDSK
1.Insert the USB drive that contains the Windows 10 installation media into your computer and reboot it.
2.Boot your computer from USB.
3.At the startup, click on Repair your computer.
4.Select Troubleshoot and then Command Prompt.
5.In command prompt type chkdsk c: /r and hit Enter. This assumes Windows is installed on your C: drive. If the drive letter for your system partition is different, type the real one. (You can run diskpart > list volume to check.)
run chkdsk in Windows installation media
5.Allow the process to complete and reboot.
Video:


No comments:
Post a Comment