Perhaps there is no need to say more about the importance of a microphone on a computer. Imagine you are about to have an online meeting with bosses in various branches of the company, close to the meeting time, and you realize that the built-in microphone on your laptop suddenly stops working, not receiving the signal. signal, now what will you have to do?
The microphone error does not work in Windows 10 is quite rare, but will bring great discomfort to users because often we only use the microphone when it is necessary. One of the most common causes of problems with microphones is that updates are not installed properly, in which case a complete fix is within your reach. Alternatively, it could also be due to a hardware problem, and in such a case, you will need the help of a technician.
In this article, we will guide you through the steps to fix the microphone not working in Windows 10 in a simple way.
1. Check if the microphone is turned on or not
Normally the microphone is always turned on on computers and laptops. However, sometimes for some reason you or a loved one has turned off the microphone. So, when you have a problem with the microphone, the first thing you need to do is check if the microphone is turned on or not. If you've turned it on and still can't get sound, then move on to the next troubleshooting solutions.
2. Micro hardware troubleshooting
Next, you should consider your audio hardware setup. This is important whether your microphone isn't working at all or it's not working properly, meaning there's no input from your microphone or it doesn't appear in the Settings menu.
If you use micro USB, try plugging the microphone into another USB port on your PC. Don't use a USB hub or extender - plug your microphone directly into a slot on your PC. If the microphone works on a different port, the first USB port may be dead or malfunctioning. For analog microphones, make sure you have the cable plugged into the pink microphone port on your PC.
Regardless of your mic type, confirm that all microphone cables are fully plugged in and nothing is loose. This includes the cable for the headset microphone, if it's detachable, and any extension cables. If you have an extension cable, try removing it to rule out the possibility of that being the cause of the problem. You should also check the cable for damage to the sheath. Replace any damaged wires that can cause problems with the microphone.
While it may sound obvious, make sure your microphone is close enough to your mouth to pick up your voice clearly.
If your microphone has a physical mute switch, make sure you didn't turn it on by mistake. Find the slider or button on the headset, the headset cord, or the front of the microphone.
If you still don't have a microphone input after double checking as instructed above, try plugging your microphone into another computer. If it doesn't work on another PC, your microphone hardware may be faulty. Try contacting the manufacturer; You can get a replacement product if it's still under warranty.
Finally, don't forget to check for updated drivers for the microphone. Most headsets and microphones work with Windows, but some may require specific drivers for best performance. Detailed instructions are available in the next section of the article.
3. Test microphone in System
When you're having trouble recording with the microphone, you can try to see if the problem is with the microphone or something else by testing the microphone in System. Here's how to do it:
1. Press Win + I to access Settings.
2. Click the System item.
3. You choose Sound then in the Input section you choose your microphone in the Choose your input device section.
4. You try speaking into the microphone and observe in the Test your microphone section. If the blue status bar oscillates with your voice, the microphone is working properly.
5. At this point, you need to find and fix the problem in other aspects such as software...
4. Restart the computer, laptop
Sometimes the simplest way to fix a problem on a computer is to restart it. Try restarting your computer or laptop to see if the problem with the microphone is fixed or not.
5. Adjust the microphone receiver volume
Setting the recording volume too low will also affect the microphone's recording quality. To adjust the receiver volume, follow these steps:
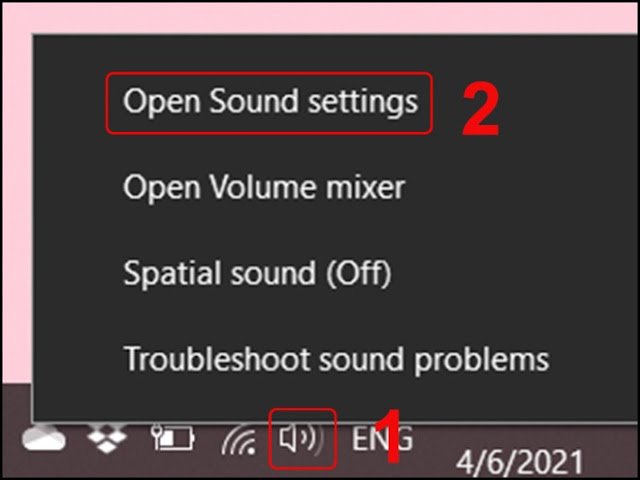
1. Right-click the speaker icon in the lower right corner of the screen and select Open Sound settings.
2. Select Sound Control Panel.
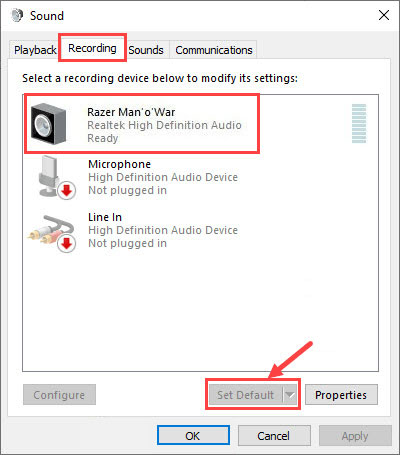
3. Select the Recording tab then double-click Microphone.
4. Select the Levels tab then increase the microphone's receiver volume. If the microphone is turned off (the speaker icon has a forbidden sign), turn it on.
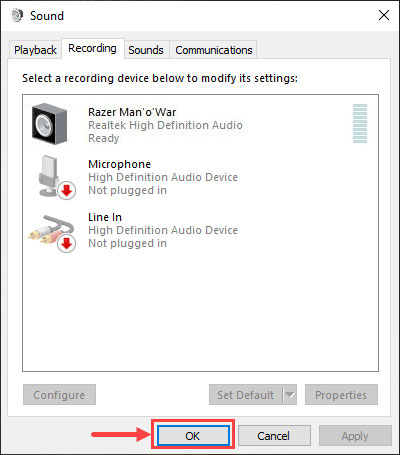
5. Click OK > Apply to confirm the settings.
6. Disable Exclusive Mode
To disable Exclusive Mode, go to the Microphone settings section according to the instructions above and then continue to install as follows:
1. Click the Advanced tab.
2. Uncheck the box Allow application to take exclusive control of this device.
3. Click OK > Apply to confirm the settings.
7. Restart Windows Audio Service
You can also try restarting Windows Audio Service to see if that fixes the microphone error. Here's how to do it:
1. Press Windows Key + R to open Run then type services.msc and then click OK.
2. In the Services window, find the Windows Audio service.
3. Right-click Windows Audio and select Restart
8. Check your microphone's privacy settings
Back in 2019, Microsoft introduced new security features for Windows that give you more granular control over which apps are accessing your microphone. A side effect of this is that certain apps may be blocked from using the microphone without your knowledge.
To check Microsoft privacy settings in Windows 10, follow the instructions below:
1. In Windows 10, go to Settings > Privacy > Microphone.
Alternatively, you can also perform a search in the Start menu to directly find Microphone privacy settings.
2. Click Change and make sure that the Microphone access slider is set to On. Generally, this means that the microphone is now enabled on your PC.
3. In Windows 10, go to Allow access to the microphone on this device and make sure the slider is On. If it shows Off, click Change to turn it back on.
4. Make sure the slider under Allow apps to access your microphone is set to On. Go through the list of Microsoft Store apps to make sure the apps you want to use with the microphone are turned on.
5. Of course, you may be using a lot of apps that aren't from the Microsoft Store, so to make sure these are enabled in Windows 10, scroll down even further and set the Allow desktop apps… slider to On.
11. Check sound settings
One of the first places to troubleshoot microphone problems, especially if your microphone isn't working, would be the sound settings in Windows. Access these settings by navigating to Settings > System > Sound.
Here, under Input, click the drop-down box under Choose your input device. Select the microphone you want to use. Note that other available inputs, like the laptop's built-in microphone or webcam, will also show up here.
Once you have selected the correct microphone input, speak into it and you will see the Test your microphone bar move up and down. If not, go to Settings > Update & Security > Troubleshoot > Additional troubleshooters and select Recording Audio. Windows will check for some common problems and try to fix everything it finds.
Back on the Sound page, click the Device properties link in the Input section. This will open a new page where you can rename the input, making it easier to identify in the future. You can also check the Disable box to prevent that microphone from showing up, or change the Volume to adjust the microphone input volume.
At the bottom of the main Sound page, you'll find the App volume and device preferences menu. This allows you to choose a different input and output device for each open application. Take a look here and make sure you didn't choose the wrong microphone for the app you're using.
Also, you should close any unused apps. If you open multiple apps that are trying to access the microphone, your microphone may not work properly in the app you actually want to use.
12. Use the Microphone section in Windows Settings
1. Press the Windows + I key combination to open the Settings application.
2. Click the Privacy option and on the left pane, select the Microphone item.
3. Turn on the allow apps to access my microphone switch to allow the app to access the microphone on the device.
4. Try recording with your laptop again to see if the internal microphone now works.
13. Use the Sound Troubleshooter
Right-click the sound icon in the far right corner of the taskbar and select troubleshoot sound problems.
The computer will automatically scan and detect any errors that exist with your sound system and offer to correct them for you.
Summary
When your mic problems are caused by a software related factor, the methods in this article will surely help you. If the cause of the problem is hardware-related, it is best to bring the product for warranty or take it to a repair shop.
Did the above methods help you? Did you find your own solution to this troublesome problem? Let us know in the comments section below! Hope the information in this article is useful to you.


No comments:
Post a Comment