If you want to make your Windows 11 PC discoverable on your network and to use file and printer sharing, you'll have to switch your Wi-Fi network profile from Public to Private. We'll walk you through the steps to make this change on your computer.

What is the difference between a Public Network and a Private Network?
When you first connect your PC to a wireless network, Windows asks if you want to make the network Public or Private.
If you choose Public, Windows ensures that your PC is undetectable on the network. It also disables file and printer sharing features so that other devices on the network don't use these options for your machine. We recommend that you use the Public profile for networks commonly found in airports and coffee shops (basically the least trusted ones).
On the other hand, if you access the Private profile, Windows will allow your PC to be discovered on the network. You can also use the file and printer sharing features while using this profile. The Private profile will be used for your trusted networks, like the ones you have at home.
Then, if you decide to change your network configuration, it should be quick and easy on your machine.
Change network profile type for Ethernet connection
1. Open Settings on Windows 11.
2. Click on Network & internet.
3. Click the Ethernet page on the right side.

4. Under the “Network profile type” section, select the profile type:
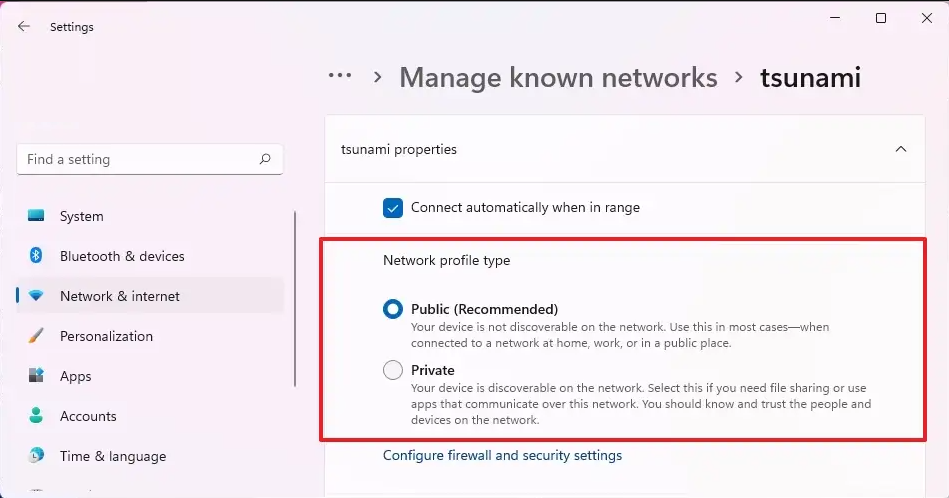
- Public: Your device is not discoverable in the local network. You should use this option in most locations, such as home, work, or public places.
- Private: Your device is discoverable in the local network. You would use this option to share files or other resources like printers over a trusted local area network.

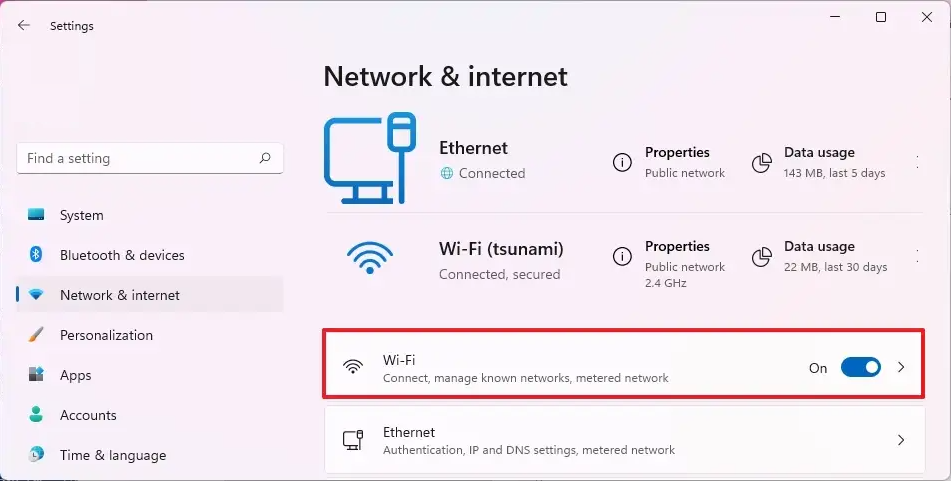
Change network profile type for Wi-Fi connection
1. Open Settings.
2. Click on Network & internet.
3. Click the Wi-Fi page on the right side.
4. Click the Manage known networks setting.

5. Click the active wireless connection.

6. Under the Network profile type section, select the profile type, including Public or Private.
Once you complete the steps, the connection will apply the profile type you select.
It’s important to note that you can only change profile type per network. If you have an Ethernet and Wi-Fi connection connected to the same network, when changing the profile type, the new setting will not apply for all network adapters.
Video:


No comments:
Post a Comment