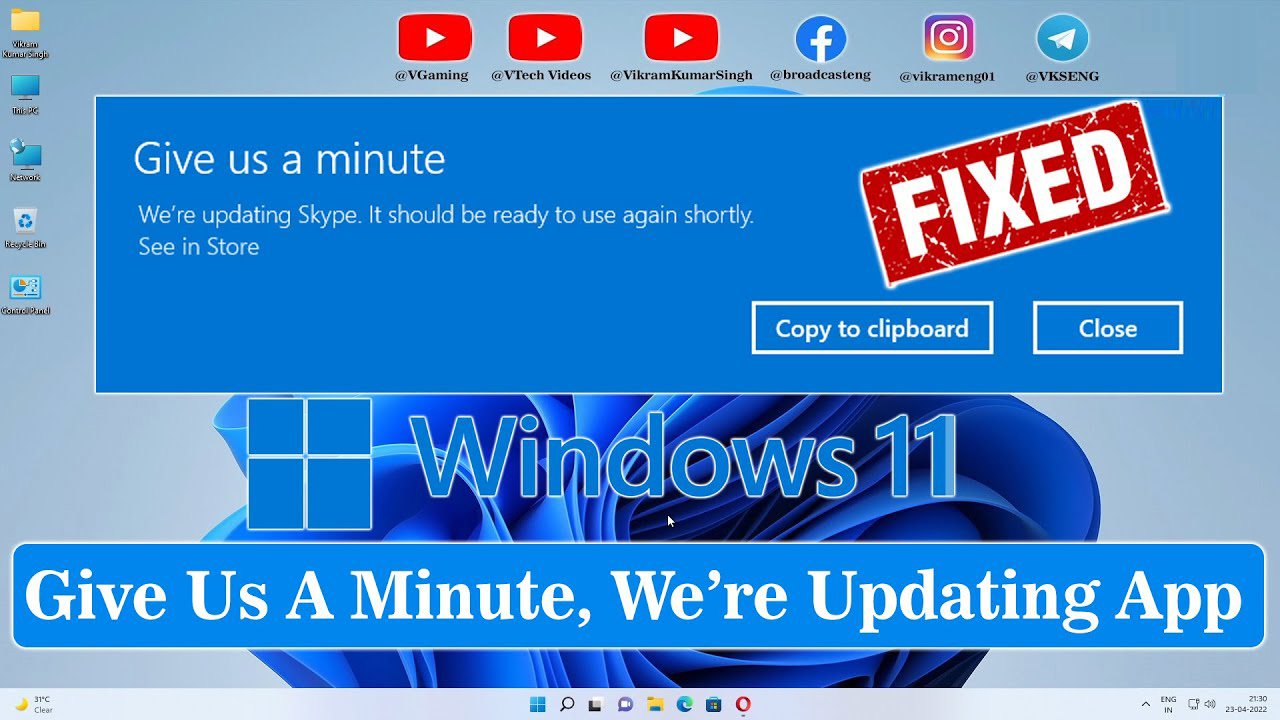
Whenever you try to open a Windows app like the Photos app, Calculator, or the UWP app, you may see an error message “Give us a minute, We’re updating the app” on your Windows 10 PC. You may also see this message for OneNote and others.
Apparently, the error shows up due to some miscommunication between your system and the update (app specific) to be downloaded. While you may want to check your internet connection once to ensure if that’s the culprit, most f the times, it does not help.
When you encounter this issue, you’ll receive the following error message:
Give us a minute
We’re updating (name of the app). It should be ready to use again shortly.
Fix 1: Reset the problematic app
You can reset the problematic app to default settings and then try to update it again.
Warning – Resetting an app will remove any appdata it contains. As the app will be set to the default settings, any account settings, modifications, and other changes will be undone. So, we suggest you back up the appdata, if possible.
A. For Windows 10
1. At first, press the Windows key and I keys together.
2. In the Settings window, tap on the Apps settings. On the left-hand side, click on the Apps & Features.
3. Then, scroll down to find the conflicting app in the list of apps.
4. Select the app from the list and click on the Advanced options.

5. Now, scroll down and click on the Reset to reset the app to the default setting.

Once you have reset the app, close the Settings window. After that, open the Microsoft Store and start to update the problematic app, again.
Check if this works or not.
B. For Windows 11
1. Press Windows key and I key together from the keyboard to open Settings.
2. Now, Click on Apps from the left menu. And click on Apps and Features from the right.

3. Now, search the App in the search box. And click on three vertical dots beside the search result.
4. Click on Advanced options.


6. Now, try again.
Fix 2: Reset Store Cache
Reset the Store cache on your computer.
1. First of all, press Windows key+S and type wsreset.
2. After that, you need to click on the Wsreset in the search result.
3. Once you have clicked on Wsreset, a terminal will open up and the Store will be reset within a minute.

A. For Windows 11
1. Right-click on the Start button and select Settings.
2. In the Settings menu, select System from the tabs on the left-hand side.
3. In the right-pane, scroll down to Troubleshoot and click on it.
4. Now select Other troubleshooters.
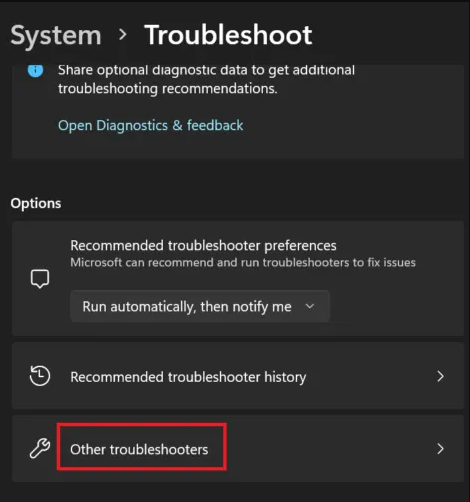
5. In the list of troubleshooters, scroll down to the absolute bottom and click on Run corresponding to the Windows Store Apps troubleshooter.This will invoke the Windows Store Apps troubleshooter.

B. For Windows 10
1. Press Windows Keys + I together on your keyboard to open the Settings window.
2. In the Settings window, click on Update & Security.
3. In the next window, go to the left side of the pane and click on Troubleshoot. Now, go to the right-side of the window, scroll down and click on Additional troubleshooters.

4. In the Additional troubleshooters window, scroll down and select Windows Store Apps. Then click on Run the troubleshooter button below it.

It will start detecting the issue and if it finds one, it will automatically fix any basic problems and also display the troubleshooting report.
Fix 4: Re-register the Store
Re-registering the application packages should solve this issue.
1. Search Powershell in the search box. Right click on Powershell and choose run as administrator.
2. . Once the Windows PowerShell in administrative opens up, copy-paste these two codes in the terminal and hit Enter to run both these commands one after another.
Get-AppXPackage *WindowsStore* -AllUsers | Foreach {Add-AppxPackage -DisableDevelopmentMode -Register "$($_.InstallLocation)\AppXManifest.xml"}
Get-AppXPackage -AllUsers -Name Microsoft.WindowsStore | Foreach {Add-AppxPackage -DisableDevelopmentMode -Register "$($_.InstallLocation)\AppXManifest.xml" -Verbose}

3. After running these commands, close the PowerShell window.
Then, just restart your computer once.
Fix 5: Re-register all Windows Store apps
You can re-register all the Windows Store apps without needing an active internet connection. All you need to do is to run a simple command in the Windows Powershell and your apps can be restored. Let’s see how.
Note: Before you make any changes, make sure you create a system restore point before that.
1. Search Powershell in the search box. Right click on Powershell and choose run as administrator.
2. In the Windows Powershell window (admin mode), run the below command and hit Enter:
Get-AppXPackage | Foreach {Add-AppxPackage -DisableDevelopmentMode -Register "$($_.InstallLocation)\AppXManifest.xml"}

This will re-register or reinstall all the Windows Store apps. Now, restart your PC and you can find any missing Microsoft Store app accordingly.
Fix 6: Running SFC /Scannow and DISM
1. Press Windows + R open Run. Type cmd in the empty box and press the OK button to launch Command Prompt.

2. In the CMD window, copy the following command and press Enter:
sfc / scannow
DISM.exe /Online /Cleanup-image /Restorehealth
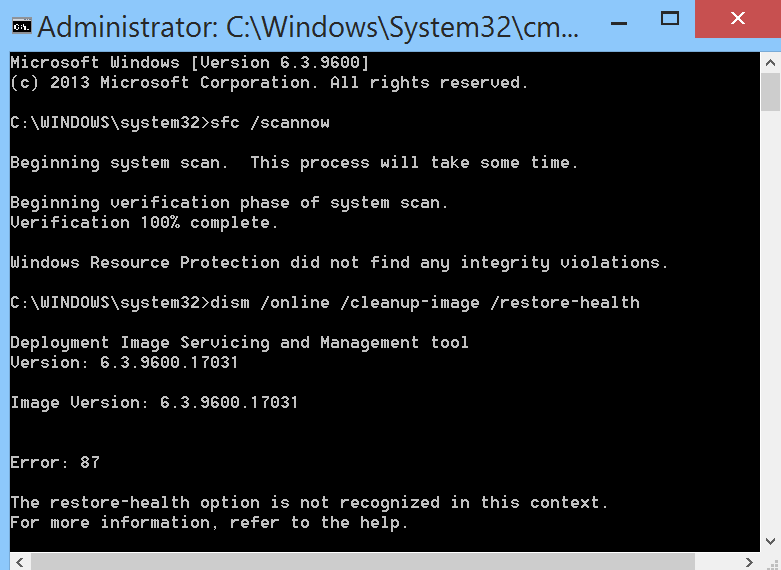
The scan may take 10 minutes, and if it completes successfully, you must restart your PC. Running sfc /scannow in safe mode or at startup may give better results.
Video:
That’s it and your PC is all new now. You should not have problems with any of the Windows Store apps now.


No comments:
Post a Comment